
You already carry a GPS, it’s your smartphone.
Some high-end cameras have built-in GPS units that geotag your photos as soon as you shoot them. However my entry-level DSLR does not have that functionality. Sometimes I don’t know the name of the place where I’m shooting, other times I’m just lazy with my metadata, other times I want to upload my photos to a photography site without manually specifying where I took the photo.
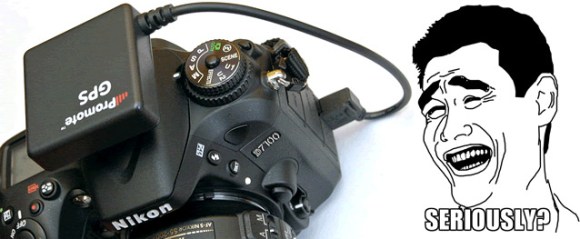
So I started looking for an external GPS unit for my camera. That would cost me at least 40€, add more weight to the camera, disenable the built-in flash, drain more battery, and make me look like a weirdo. The minimalist in me said “Nonsense! There’s got to be a better way!” — and he was right.
What you need
- A smartphone (i.e. a GPS device capable of recording/exporting a route)
- A digital camera
- A computer
- A beautiful place to photograph
Part 1 – Recording your GPS location
- Assuming you have an Android smartphone, install Geo Tracker app.
- Before taking any photos start the app. Make sure you enable the Location services on your smartphone’s settings.
- The app will search for a GPS signal and your current location (up to 5 minutes). When your location appears in a map it means your good to go.
- Press the big red button to start recording your path.
- After you finish your photo trip, open the app again and stop the recording.
- Make sure you export your recently recorded track to Google Drive.
Part 2 – Embedding the GPS metadata into your photos
- Import your photos from your camera. I use raw files (.nef because I own a Nikon) but .jpeg will work just fine too.
- Download your track from Google Drive (or directly from the app) to your computer.
- Install GeoSetter.
- Start GeoSetter and open the folder containing the photos you imported on step 1. Then press the button that synchronizes a GPS file with the selected photos. The screenshot below illustrates this step.

- A window will popup asking you to selected the GPS track file to sync. Browse your
track.kmzfile. Configure the remaining options to suit your preferences.
- Start the synchronization process.

- After the sync is complete, don’t forget to save the changes to your photos, by pressing the blue diskette button. Doing so will tell GeoSetter to embed the GPS information from the track into your photo’s metadata.


Well done
Now your photos have GPS coordinates, without buying any additional gear and even though your camera doesn’t have an internal GPS. You should be proud of yourself. Help your photography friends by sharing this tutorial with them.
14 replies on “Geotag your DSLR photos using just a phone”
Thank you for this article, very helpful and as somebody working in geospatial field, I can tell your workaround totally makes sense. It would work even better than a high-end camera with built-in GPS in certain situations, as your phone has a better chance of recording more accurate location in crammed urban areas (as it uses both satellite signals and towers) than camera built-in GPS (needs good satellite reception, not possible indoors or under high rise buildings, camera loses signal every time turned off trying to catch signal once turned on).
Anyway, Thank you for sharing
I’m writing an update version of this article that uses a simpler Android app and integrates with Adobe Lightroom. Stay tuned ;)
Does this process work if you are moving around as well? For example if you are shooting at multiple locations, do you start the tracking app once at the beginning and end it only once you have finished up at all your locations? Or do you have to start and stop at each location?
Yes for sure Ryan! You can move around freely as long as you keep your GPS recording app (in this case, My Tracks) enabled. Just start the recording as you arrive at the location and stop it when you finish. The GeoSetter software will afterwards guess your location by looking at the GPS and your photo’s timestamp and interpolate a position if necessary.
Google recently announced this app will no longer work after April 30, 2016. Thus, they have removed the app from Play store. Even if a copy exists, it will no longer work staring in May.
Are there any other combination of apps that would make your method work?
Thanks for the warning.
I recommend a new app: Geo Tracker (https://play.google.com/store/apps/details?id=com.ilyabogdanovich.geotracker)
I’m sorry, but this doesn’t seem “easy” by any means. It’s 2015 and we are carrying around these incredibly powerful computers but our DSLR cameras seem stuck in 1999.
Literaly, my first sentence is “high-end cameras have built-in GPS”. The technology exists however it will cost you; I just presented a cheap workaround. It’s true that it comprises several steps but none of them are hard.
I did a lot of research on this topic recently. There are some great mobile apps now that make this much easier. I recommend checking out GeoTagr for iOS.
Anything for Android?
I didn’t come across anything but that’s probably because my attention leans towards iOS.
Yeah, unfortunately my Sony HX400V and iPhone have me spoiled. I turned the GPS on once and don’t have to think about it again. As someone who uses GPS daily and is considering upgrading to a mirrorless camera, this option is disappointing. Even today, almost no mirrorless cameras have GPS so I would be throwing away one of the features on my camera I use the most or be forced to use work around. It makes a lot of sense if you only want to use GPS once or twice, but I really would hate to add these steps to my daily routine.
Try GeoTagr for iPhone. I’ve started using that and it’s great. Worth the price.